Fact-Checking 2: Geolocation
- Geolocation
- The process of fact-checking the location of an image or video. Oxford Dictionary
Photos are the backbone of social media, but it can be difficult to verify where they were taken and if they correspond to the story they are posted with. Left unchecked, visual material can be used to spread fake news.
In this lesson, students will learn how to check the location of an image by looking at visual clues and using a search engine and map apps.
Lesson goals
- Learning to look at images and videos like a fact-checker does
Activities
Theory (20 minutes) - Teacher-centered
Introduce geolocation to the students. Optional: give a short introduction to chronolocation.
Aim: students learn what geolocation is and how to use it.
Example (5 minutes) - Teacher-centered
Geolocate the first image with the group as a demonstration.
Aim: students see how geolocation is done in practice.
Exercise (20 minutes) - Smaller groups of 2-3 students
Students geolocate as many images as they can. There will be more time for the exercise during the next lesson hour.
Aim: students use geolocation methodologies to fact-check the location of an image.
Discussion (10 minutes) - Class
Discuss answers with the class, depending on how many locations most students found. Reveal the correct answers of the locations most students didn’t get round to without going through the entire process.
Aim: students reflect and share results and experiences on exercise.
Play some rounds of the game GeoGuessr or Where am I? (free), where you have to put a pin on a world map to guess where a photo was taken.
Aim: Aim: Students play a fun game related to the topics in the lesson
Discussion (Optional - teacher decides) - Class
Discuss some discussion questions with the students.
Aim: students learn more information about geolocation.
Theory (20 minutes)
A picture is worth a thousand words. This is especially true in online (social) media that are becoming increasingly visual.
A dramatic image might be used to convey a dramatic message. But what if the picture is not showing what it says it does? Just like written information, it is important to fact-check pictures.
If an image is used to convince the people who see it that a disaster has occurred in Germany, but you find out the picture was taken in Poland, the story doesn’t check out. This brings us back to the five fact-checking questions:
- Who is behind this information?
- What are the main claims they are making?
- What is the evidence for their claims?
- How is this evidence being used to substantiate their claims?
- What do other sources say about the organisation and its claims?
Images and videos on the internet often contain more clues to their whereabouts than you might think.
Gelocation is the process of fact-checking the location of an image or video.
You can also fact-check when an image of video was taken. This process is called chronolocation. This will not be part of the exercise in this lesson.
Geolocation can be done using a search engine, map and a streetview apps. The goal is to focus on any features in the image or video that stand out and could tell you something about the location of the scene.
Before you dive in, however, it never hurts to perform a reverse image search when fact-checking an image.
Reverse image search is an online search function using an image instead of keywords. It can be used to find the original source of an image.
Say, a photo is shared as being taken at last week’s protest against agricultural policy in Germany. You reverse image search the picture and find out that it first surfaced on the internet five years earlier, after a respected news source reported on a protest in Belgium. It seems unlikely that the photo was actually taken at last week’s protest in Germany. You have now fact-checked and debunked the post’s claims.
To try this out, save this photo of the Perseverance Mars Rover from published by the BBC.
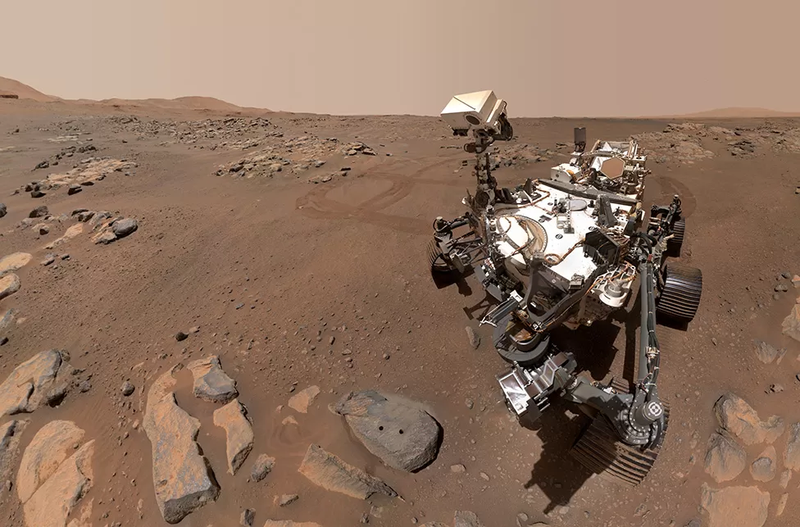
Next, use Google reverse image search to search for the picture. Click the camera icon to search by image and upload the saved picture. Google will show lots of media outlets that used the same picture in their articles. To find the original source, click “find image source” above your uploaded picture. It points to the NASA website about the Perseverance Rover, which corresponds to the photo credits by the BBC.
Reverse image search doesn’t always help to verify your image. If you want to know if the location in the picture corresponds to the story the picture is attached to, it is time to use geolocation.
Geolocating an image
Clues to look for when geolocating an image:
- Street signs
- Number plates
- Shop signs
- On which side of the road people drive
- Public transportation
- Noticeable buildings
- Noticeable landmarks
To get the process of geolocation started, write down what you are seeing in the picture by addressing these exploratory questions:
- Describe what you are seeing in broad strokes, like you are explaining it to someone who isn’t looking at the picture.
- Describe anything that stands out, like striking architecture or landscapes, with extra detail.
- Can you see any writing? Note it all down for further research. If you cannot read the alphabet, try to discover what alphabet it is (in Europe, people use the Latin, Greek, and Cyrillic alphabet).
- It always helps to search for the most obvious signs right away. If you see a restaurant with a distinctive name in the background, you might find your location by searching the name.
In short, geolocation uses clues from a picture to trace where a picture was originally taken to see if it backs the story it is associated with.
Check out Bellingcat’s guide to geolocation for more in-depth information.
Optional: introduction to chronolocation
Chronolocation is the process of checking if the moment in time mentioned by the source is in fact when the image or video was taken.
Like with geolocation, it is useful to take a look at the surroundings. Clues to look for are:
- Seasonal indicators
- Advertisements and posters
- Mobile phones, or other technology
- Construction works
Finding the exact date to an image or video can be tricky, but you might be able to find a period of time you believe it was taken. Is it snowing and do you see a movie poster in a tram stop in the background? Look up when the film was screened in this particular location, and perhaps you can even find out on what days it snowed that year.
There are more methods to checking the time an image or video was created, like checking its metadata or even by looking at the angle of the shadows, but we will not go into those here.
Example (5 minutes)
Take a photo from your city/location and go over the kinds of information you can infer from looking attentively at a landscape (street signs, number plates, shop signs, on which side of the road people drive, public transportation, noticeable building, noticeable landmarks).
Exercise (20 minutes)
Students will use the theory, tools, and example cases to geolocate the following example pictures taken in Google Streetview.
Tools
- A search engine
- Google, Ecosia, Bing
- Google reverse image search
- A maps app
- Google Maps, Open Street Map, Apple Maps
- A streetview app
- Google Streetview (integrated in Google Maps), KartaView (integrated in Open Street Map), Apple Look Around)
Preparation
- Students are divided in groups of 2-3.
- Share the folder containing the example pictures with the students.
How to offer support when students get stuck
- Groups write down answers to the exploratory questions:
- Describe what you are seeing in broad strokes.
- Describe anything that stands out, like striking architecture or landscapes, with extra detail.
- Can you see any writing? Note it all down for further research.
- Search for the most obvious written signs right away.
- Groups discuss and write down what they have learned so far.
- Groups reflect on what they know, where their knowledge gaps are and what they need to know to fill them in.
- What do I know?
- What does this mean?
- What do I need to know?
- How do I find out?
- Groups try to find the exact location of the example pictures. If they get stuck, the teacher can help, or they can write down what they do know.
- Groups repeat the process for as many pictures as they manage to do within the time.
Discussion (10 minutes)
The class discusses the different locations of the example pictures and what methods they used to find them.
Answers:
- Screengrab 1
- 3 Ul. Ivana Zajca, Rijeka, next to the Ivan Zajc Croatian National Theatre
- Link
Process
Search for the text of the banner on the building on the right, saying kazališna pretplata (meaning “theater subscription”). This leads to two websites: the Hrvatsko narodno kazalište u Zagrebu, which is the national theater of Zagreb, Croatia, but also the national theater’s location in Rijeka. Go to both locations in Streetview and “walk around” until you find the right location, which is in Rijeka, on the left of the theater entrance.
- Screengrab 2
- 32 N828, Bouillon, Belgium
- Link
Process
The photo shows a sign pointing to the right to a restaurant called “Table des Sepulcrines”, which points to a French-speaking location. When you search for the restaurant, it shows an address in Boullion, Belgium (Belgium is trilingual: Dutch, French, German). Look up the address in Google Maps and follow the river to the left. You will find that Google Streetview doesn’t allow you to walk all the way to the location of the photo, so you will have to make a small jump to the main road to find the correct location.
- Screengrab 4
- B4518, Rhayader, Wales, UK
- Link
Process
Search the place name on the place name sign saying “Cwmdauddwr” (some students might already guess this is in Wales). Place name signs are usually located where you drive into a place, which is often by a regional road rather than a local road. The biggest road around the village is the B4518. Use Streetview to locate the place where the picture was taken.
- Screengrab 55
- Dommeldange station, 3 Rue de la Station, Luxembourg, Luxembourg
- Link
Process
The picture shows a train station with writing in French, which implies the location is French-speaking. Zooming in on the bus stop poster, another language appears: Luxembourgish. Search for train stations in Luxembourg, and you’ll find there are only four. Check each of them out to find the right one and search for the right location.
- Screengrab 6
- Dacia Blvd 18/1, Chișinău, Moldova
- Link
Process
The casino is less helpful than it might appear. Search for the “FinComBank” and you will find it only has locations in Moldova, most of them in Chișinău. When grabbing the orange Streetview character, it shows that only the ring in Chișinău is available for Streetview. On the ring are five FinComBank locations, one of which is next to Casino Europa.
Exercise (Optional)
Play some rounds of the game GeoGuessr or Where am I? (free), where you have to put a pin on a world map to guess where a photo was taken.
Discussion (Optional - teacher decides)
- How can geolocation be used to debunk a story?
- How come photos of an unrelated location might end up next to a news story?
- What are the top-3 things to look for when geolocating an image?
- What should a fact-checker do when they cannot verify the location?
- Why can chronolocation be important when fact-checking a news story?